Baby Boy Update – Nursery

Hello!  This post has been in my drafts for three weeks – I started writing it on Sunday February 7 (when I was 2 days overdue by the way), and because it was so lengthy I decided to take a break and come back to it later, or tomorrow.

Well.  When I was in bed that night, I went into labor.  And just 8 hours later we had our beautiful baby boy!  We have been using our nursery non stop since he has been home so I am thankful that we were able to get it finished in time.

I hope you enjoy it as much as we are 🙂

Since I found out that our little baby bean is a BOY! I have been tirelessly (actually not, I’m spent all the time) trying to put together a super cute, masculine, youthful yet not too babyish (is that a word?) nursery.  I started collecting a few items here and there knowing that I wanted to go in the ‘woodland’ direction since my husband is very outdoorsy and it really fit us as a family.  But I also didn’t want it to be too predictable (ie. camouflage this, deers everywhere, etc).

I gathered inspiration from Pinterest of course, and posted some of my Pinspiration a few posts back. And as a result I think it turned out pretty much perfect.

DSC_0417

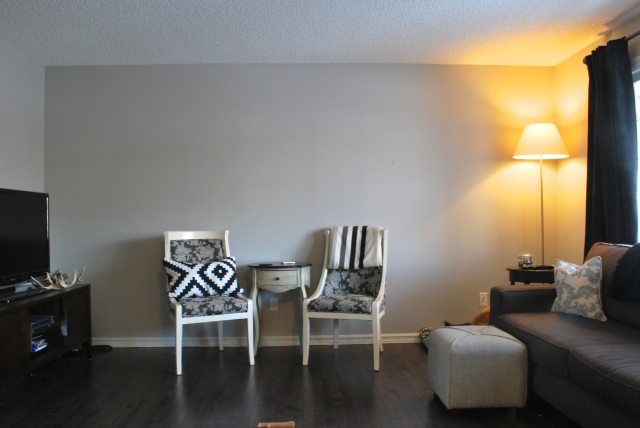
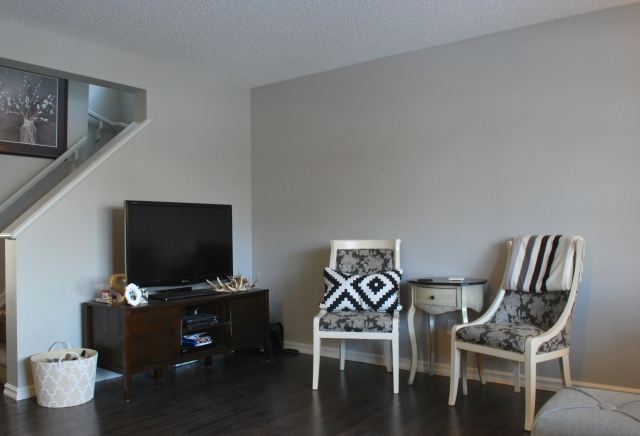
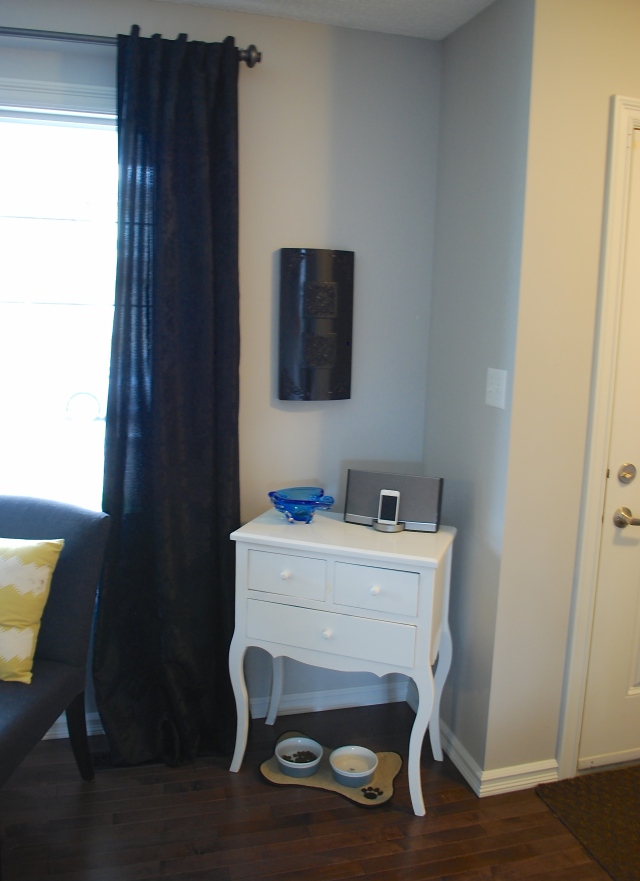
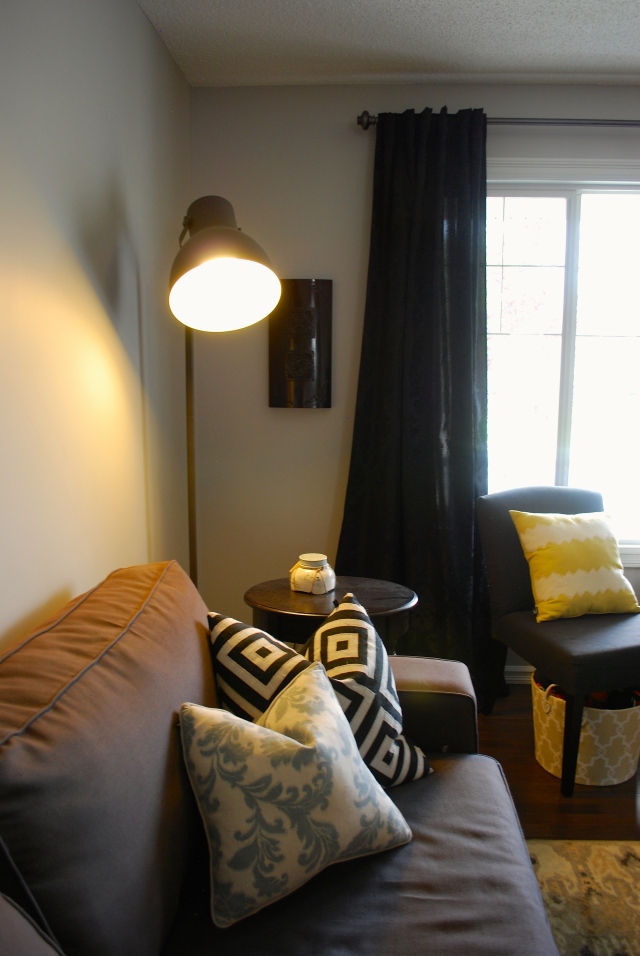
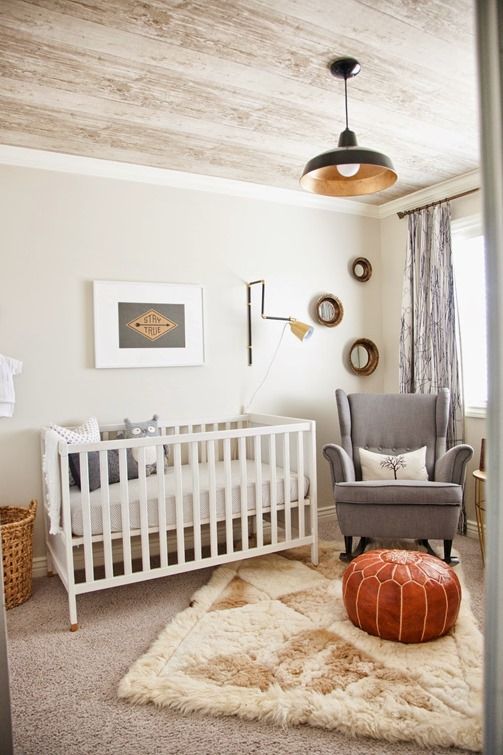
By the way, this is what I started with:

DSC_0452

DSC_0450

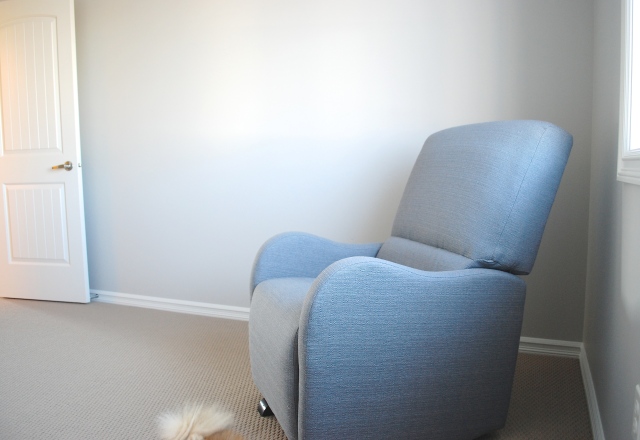
Yup, we emptied out the room, gave it a solid cleaning and started fresh.  There were never any blinds even installed in here so it was a complete fresh canvas to work with.

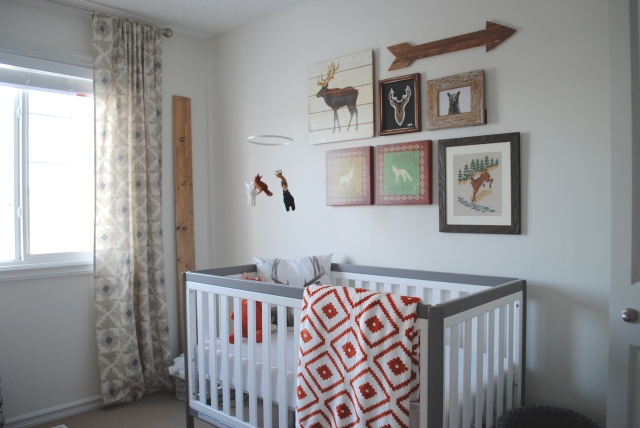
And look at the difference!

DSC_0423

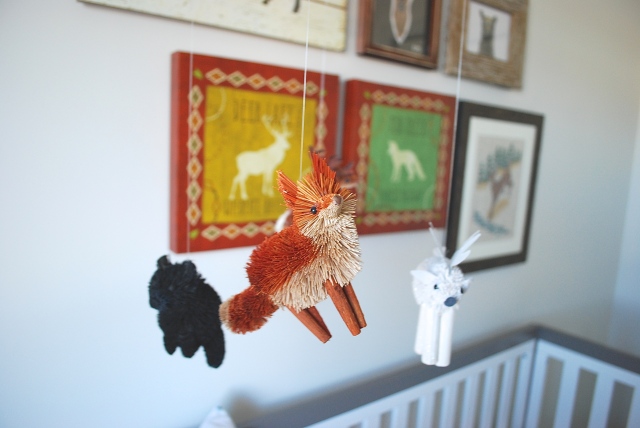
One of the first things that we bought for this little baby was the Jellycat fox. I couldn’t resist him!

DSC_0396

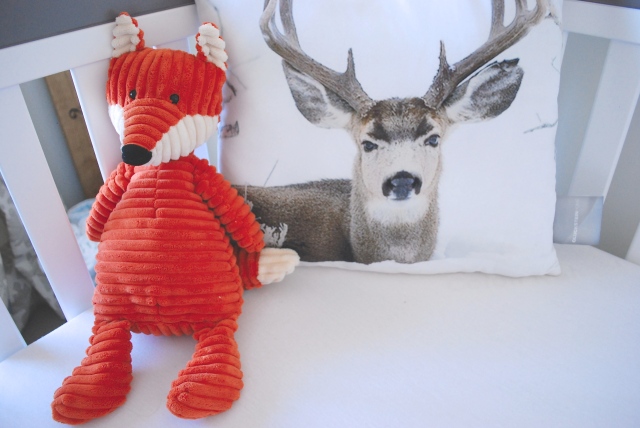
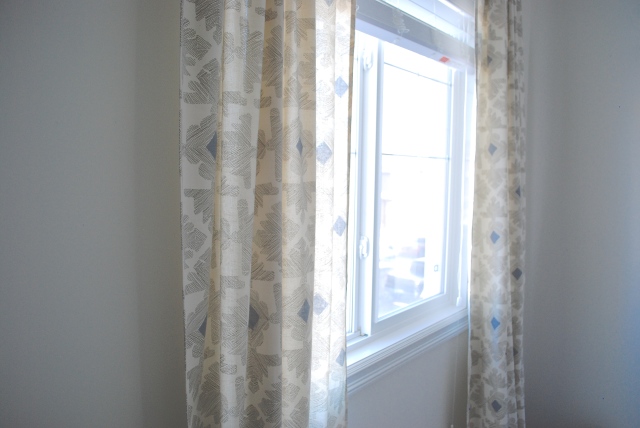
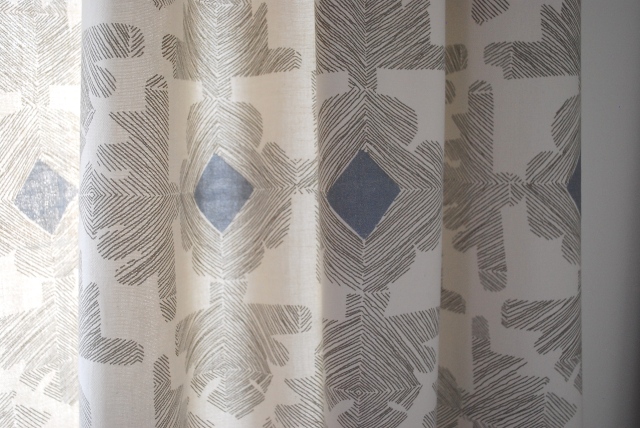
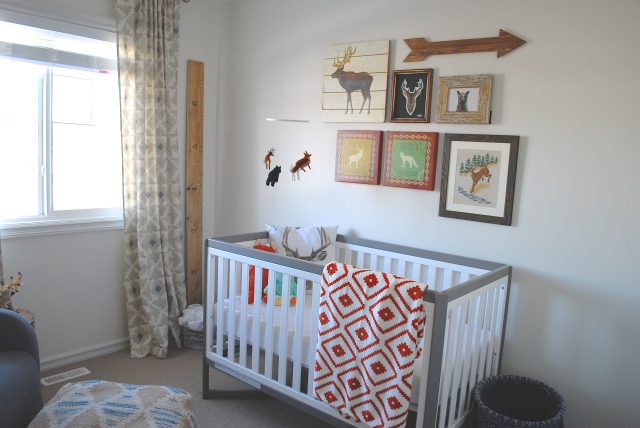
The next purchase were these curtain panels from Crate and Barrel so I used them and the fox as my jumping off point.

DSC_0394

DSC_0407

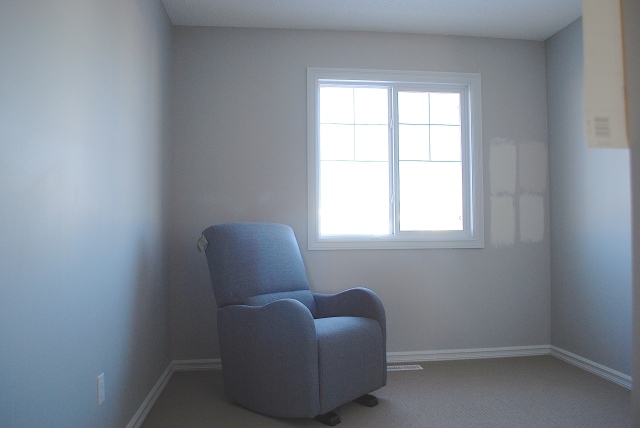
Deciding on a wall colour – that was fun.  Not.  I wanted a warm white but because this room has north exposure the light can be a little weird and it made the whites turn out a bit darker than I wanted.  Oh and I didn’t want it to be yellow.  After many trips to Benjamin Moore we settled on Dune White (by we I mean I) and my handy husband painted it up nicely in one day.

Nursery 2

Source

I LOVED this wall colour (Grey Mist by Benjamin Moore) and tried to make it work in the room but it turned out super yellow due to the light, so it was a big NO.

DSC_0376

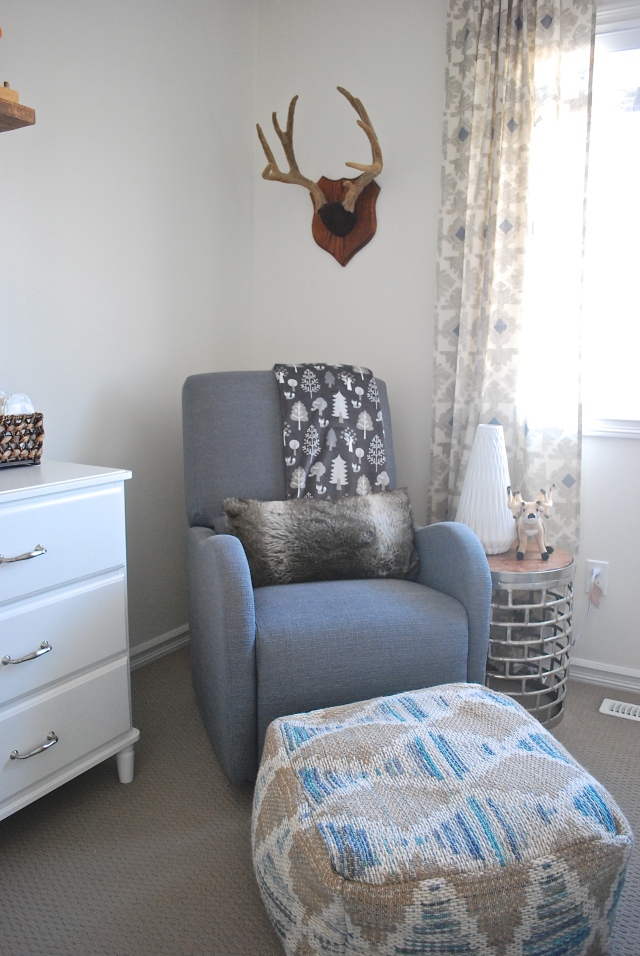
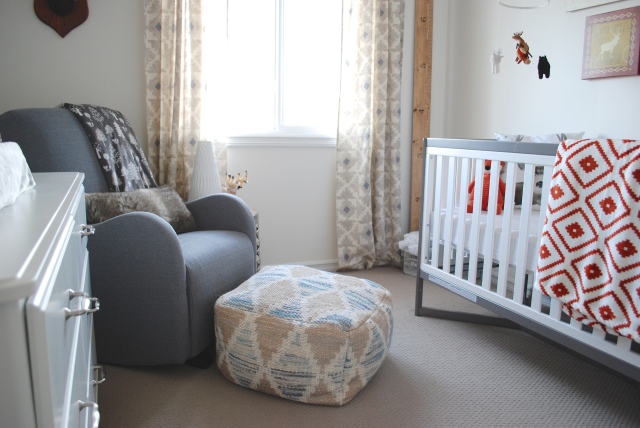
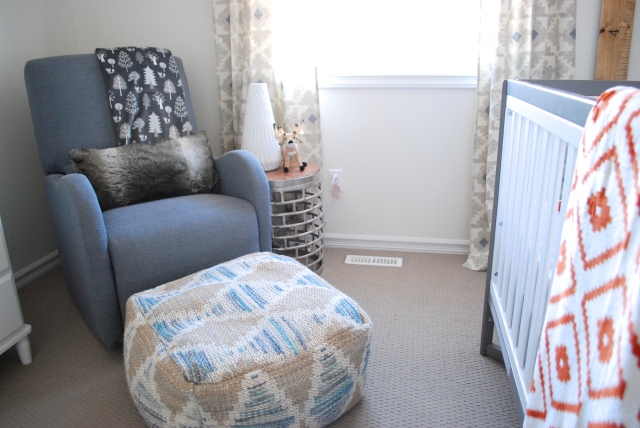
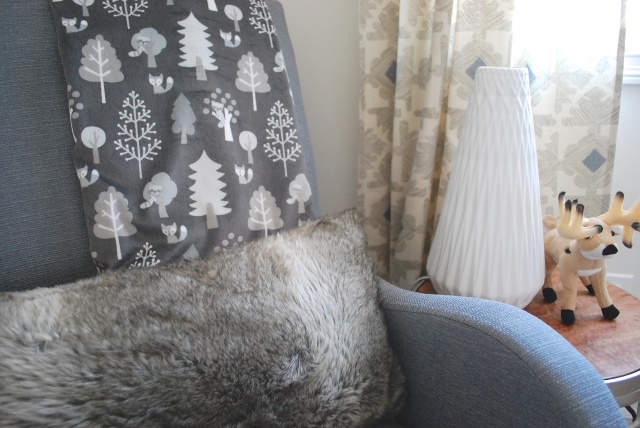
Searching for a glider was also not much fun.  The majority of gliders that I liked were priced higher than I wanted to spend (if I am spending over $1000 on a chair I want to put it in my living room – right?).  So I found this one at Babies R Us.  It was comfortable and in my price range (under $500).  The poof and side table were both Homesense finds (the best part – I had pinned this poof in my Pinterest Nursery Board and didn’t even realize it until about a week after I put it in my nursery).

DSC_0375

DSC_0378

DSC_0401

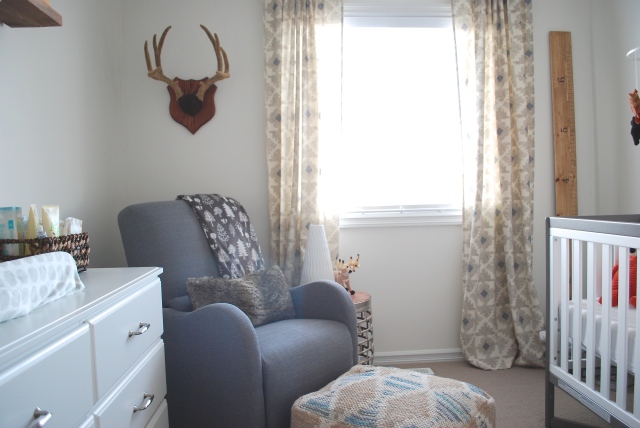
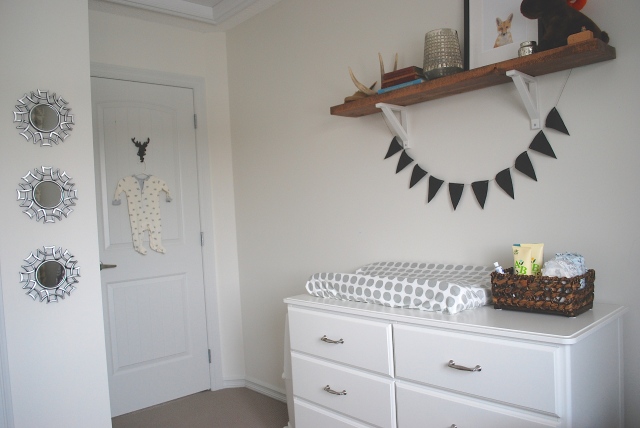
We decided on the Tyssedal dresser from Ikea.  I was planning on using the Hemnes dresser but measuring it for the space it was way too long, forcing the diaper genie to be tucked in by the glider and I did NOT want to be smelling poop all the time while nursing.  Tyssedal was the perfect length and is super cute too 🙂

DSC_0385

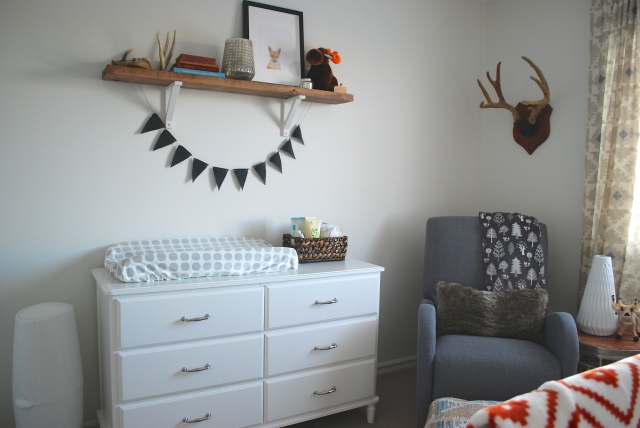
We made the shelf above the dresser – using 2 $2 Ikea brackets that I quickly painted white, and a 2″ x 8″ board I had Home Depot cut for me, then stained.  Trophy husband then installed at my request.

DSC_0389

DSC_0391

DSC_0430

DSC_0431

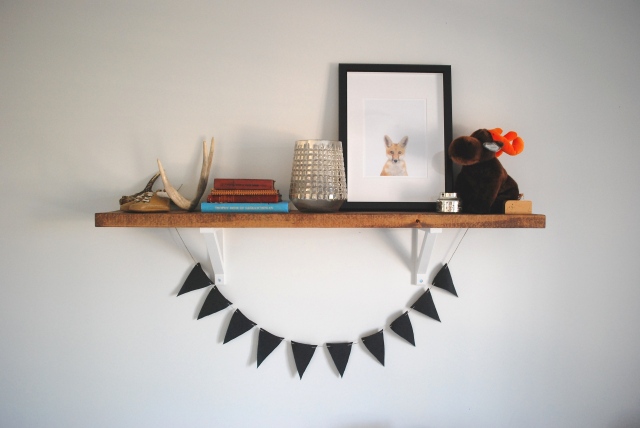
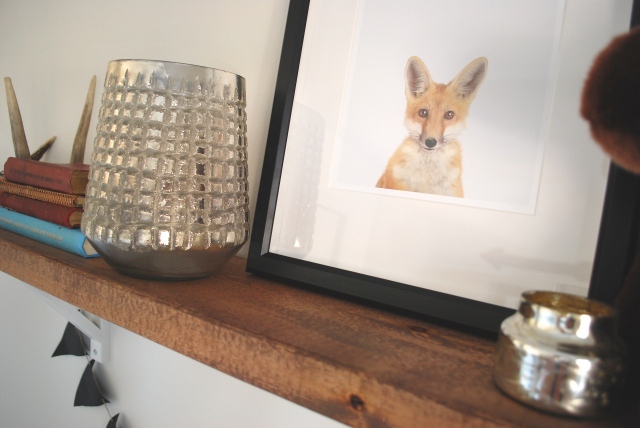
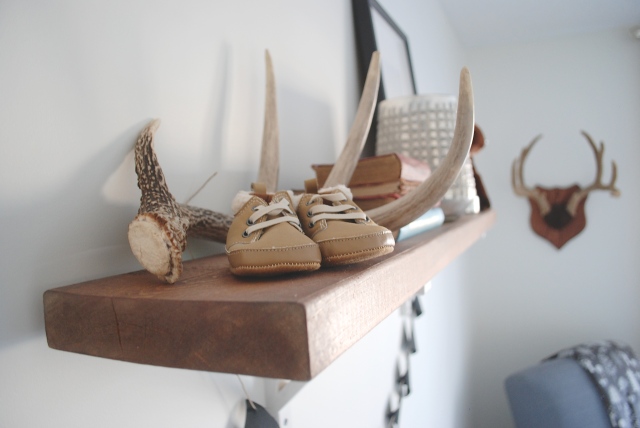
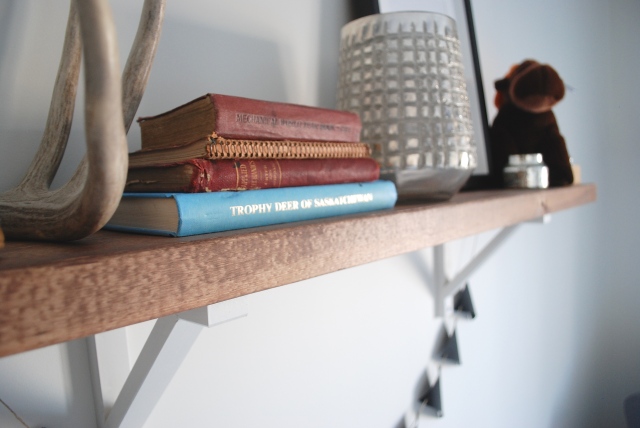
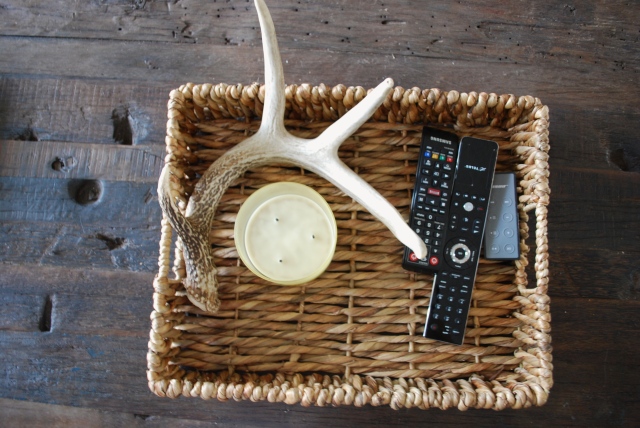
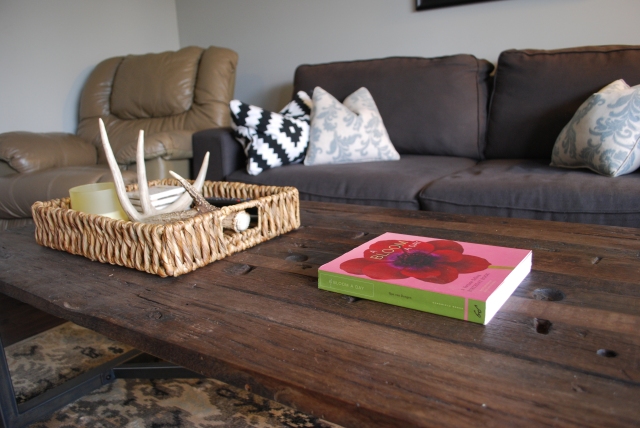
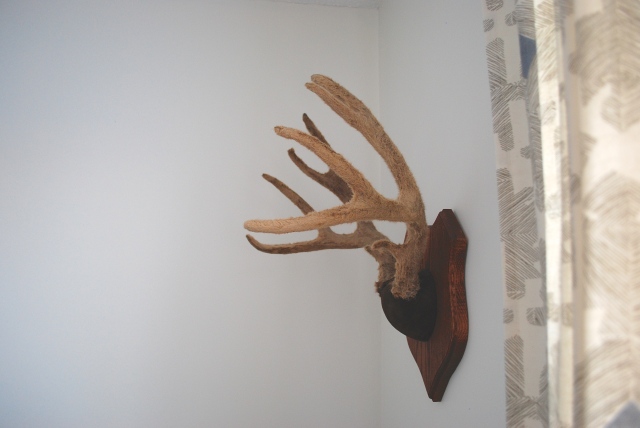
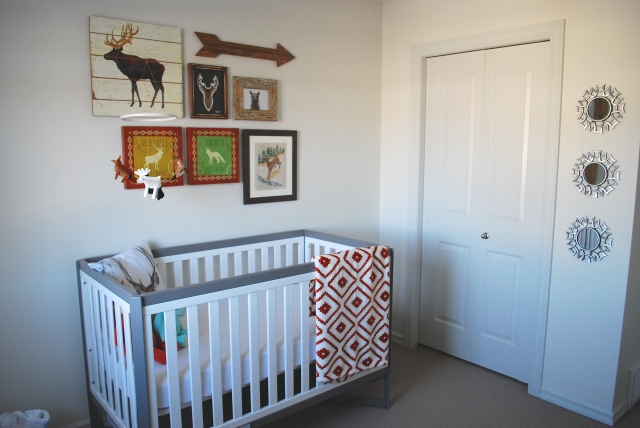
The antlers are all from my trophy husband, the books are vintage from family (the red ones are old machining books from my husbands late grandpa – my husband is a machinist by trade as well so its special to have them) and the fox print is from The Animal Print Shop – which I absolutely LOVE.

DSC_0385

DSC_0405

DSC_0390

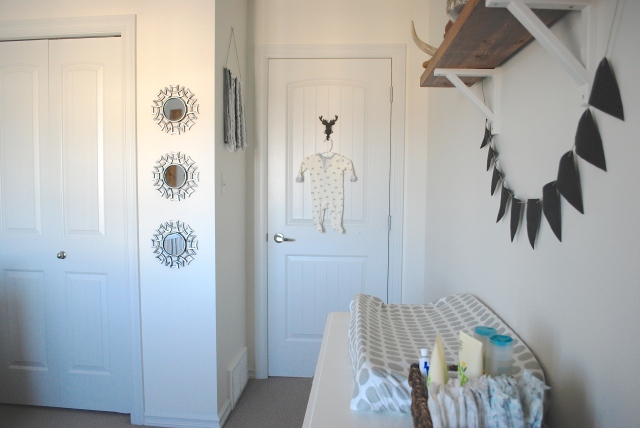
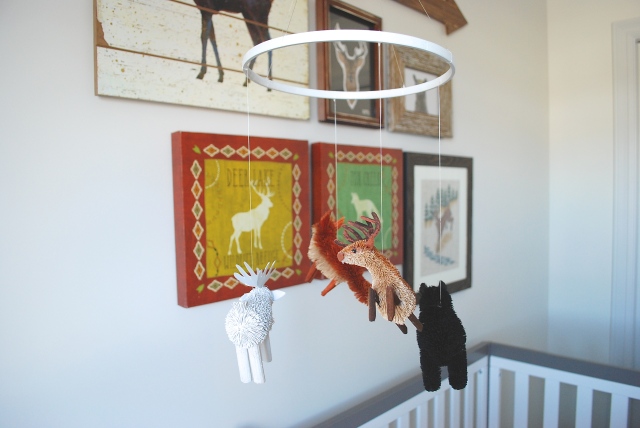
I made this mobile out Christmas decorations that I found at Chapters and Home Outfitters.

DSC_0368

DSC_0371

DSC_0381

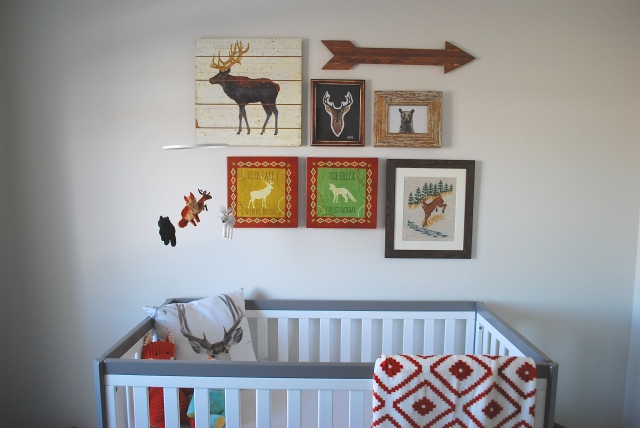
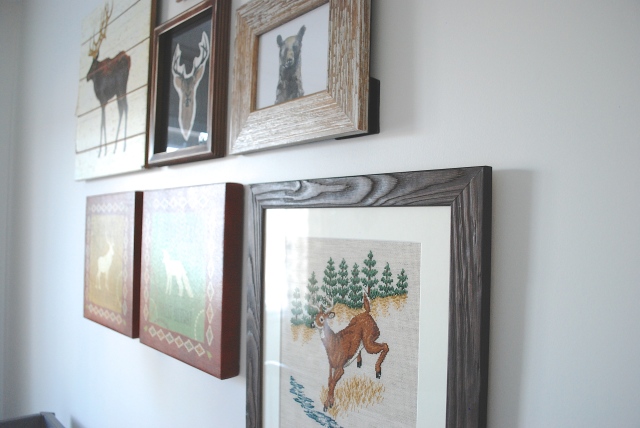
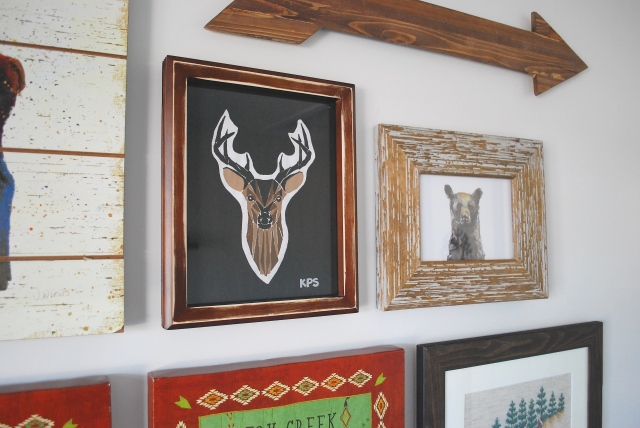
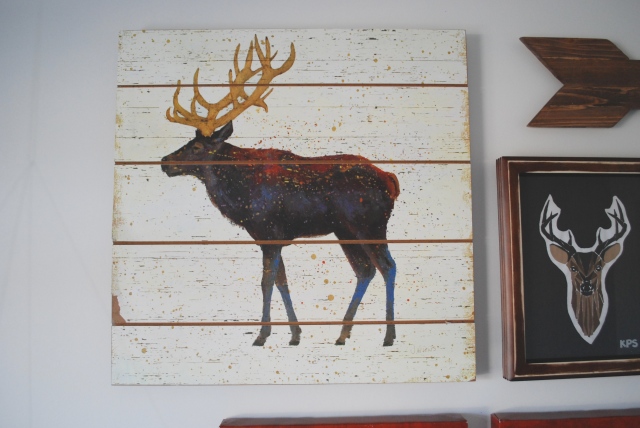
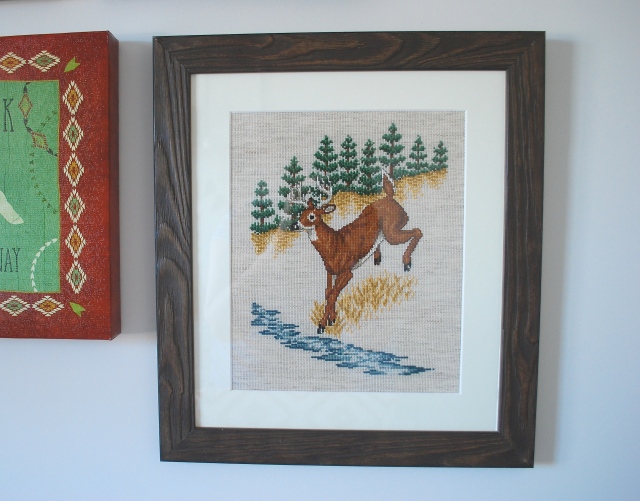
My husbands mom (Grandma!) made the deer cross stitch (in the bottom right of the gallery wall) for my husband when he was very little, and she had never done anything with it once she had finished it.  She asked if it we wanted it for the nursery and it worked perfectly, so we had it framed and now it gets to live in the gallery wall in the nursery.  His sister also painted the deer head in the centre of the gallery.  The rest were sourced from Homesense and from a local artist.  The arrow was a Michaels find (that I bought with a 40% off coupon) that I just stained with the same stain as the shelf.

DSC_0443

DSC_0367

DSC_0370

DSC_0372

The crib was easy! Its the Delta Tribecca which I was able to get in stock, from Sears, in Edmonton!  No waiting, no shipping charges! Its convertible so as baby grows we can adjust it to suit his needs.

DSC_0383

DSC_0384

DSC_0397

DSC_0393

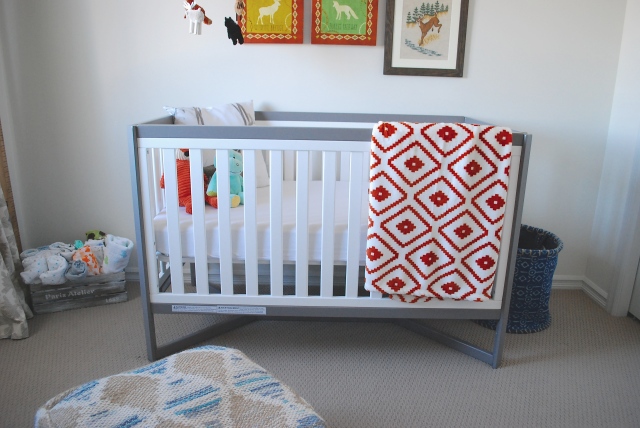
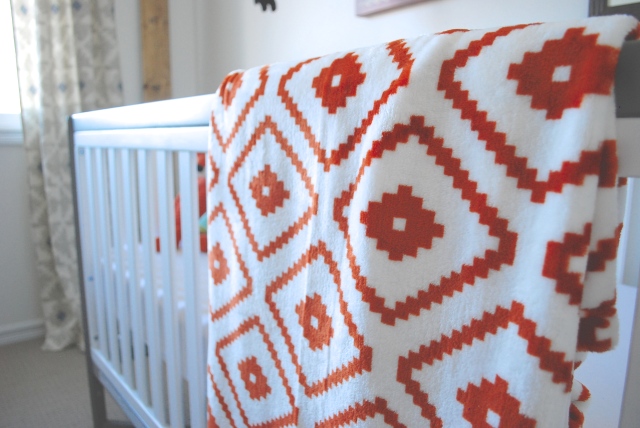
 The orange and white blank has been wonderful for me – keeping me warm during my late night nursings.

I am so in love with this how this space turned out!

DSC_0380

Let me know what you think! ❤

Love you lots – April

The Best Banana Bread Ever

I am a HUGE fan of banana bread.

Huge.

DSC_0466

So is my husband, so much that we can barely wait until it cools enough to cut it when it comes out of the oven (often it ends up a bit crumpled as a result, but I don’t even care).  Its all steamy and warm, with the butter getting all melty.

Yum.

Last night I decided to whip up a quick loaf so I busted out my trusty recipe.  Weird thing though, I use a family members recipe and theirs turns out so different from mine and I really don’t change anything (other than adding a teaspoon of vanilla).  Theirs has a soft outside and super tender inside, while mine has a lovely crusty outside and a super tender inside.  Have you noticed that your recipe turns out different from the original even when following it exactly?

DSC_0461

Anyways, I digress.

Please enjoy this amazing recipe and I hope it turns out wonderfully for you.

DSC_0460

 Banana Bread

1/4 Cup Butter, 1 Cup Sugar, 1 Egg, 2-3 Mashed Bananas

1 1/2 Cups Flour, 1 Tsp Baking Soda, 1/4 Tsp Salt, 1 Tsp Vanilla

Cream butter and sugar, then add mashed bananas.  Add beaten egg and vanilla and mix well.  Add dry ingredients (I usually whisk them together in a separate bowl and then add to the liquids).  Add any nuts or chocolate if you are into that.  Pour into a greased loaf pan (I spray mine with Pam Coconut Oil and it always comes out easy) and bake at 350 until a toothpick comes out clean from the middle (usually for me about 50 minutes, but check on it periodically – the original recipe called for 30 minutes – which is super strange because my oven usually runs warm!).  Remove from oven and let cool (if you can) then enjoy!

DSC_0476

DSC_0472

DSC_0470

Seriously, so easy and so tasty!

April

A little bit of Baby Boy Pinsperation!

From the start I knew that I wanted to find out the sex of our baby.  It seems that people are of either camp – either they need to know, or they absolutely don’t want to know, with nothing in between.

Well I needed to know.  I knew from the start that I would want to know what the sex was so that I could plan.  I like to plan, not that I am the best at planning or anything, but I like to have a plan.  Especially going into a major life change like this.  So I was supremely delighted that our baby wasn’t shy and showed us his goods.

So I have been planning.

Because my husband is so outdoorsy he wanted there to be deers and antlers everywhere – I think at one point he even mentioned camo bedding or something along those lines.  I shut that down.  But he is in luck that the woodland look is on trend right now and we can have a little outdoorsy baby in a super cute nursery that still incorporates my trophy husbands lifestyle.

Nursery 1

Source

Nursery 3

Source

Nursery 5

Source

Nursery 4

Source

Nursery 6

Source

How cute is all of this?? I can’t even.

It’s A…

Hello lovelies!

A few weeks back we had our second ultrasound and we were lucky to have a good view of our growing baby!

FullSizeRender

We were really hoping to find out the sex and lucky us we found out that we are having a beautiful baby BOY!

Since we found out I have been going a little crazy over the boy stuff – like these super cute onzies from Joe Fresh:

IMG_8708

And these super cute little pantaloons from Precious Peanut Design:

IMG_8694

Can you tell that our little man is going to be an outdoorsman?

We’re just a little bit obsessed.

BIG News!!

I know that I have been a bad blogger over the past 9-10 months (eeeep! Sorry!) but there have been some major changes going on around my house.

Firstly I changed careers – I spent 4 years in New Home Sales and last fall I started my education (which took me a little longer than I anticipated – whoops!) so as of April 2015 I officially became a licensed Realtor in Edmonton!  I became a ‘business owner’ and started working for myself… which is AWESOME!

It has been really fantastic so far – working with great clients, touring some of the coolest properties in Edmonton, and participating in some of the largest changes in peoples’ lives.  I absolutely LOVE my new gig.

My husband also made a change to his career – he is now in outside sales selling the product that he spent 10 years making.  He went from having to wear jeans to work every day to dress pants, dress shirts and dress shoes – I call him ‘Fancy Man” ha ha ha.  I love it.

But the biggest change of all:

IMG_8415

Yup!  Its happening!

We are welcoming a new baby to our family early next year and we couldn’t be more excited!

Stay tuned for updates!

April

Super Delicious Tomatoe Flatbread

Hello!  Remember me?

Get ready for a super delicious, super easy flatbread treat.  Be prepared to make a lot, because they are so good everyone will want their own and will be sad when its over.

I got this recipe from a girlfriend who is pretty magical in the kitchen, so magical that she just thought this one up one day.

DSC_0397

DSC_0394

DSC_0396

DSC_0403

DSC_0399

Ingredients:

1 White onion – Large, and some olive oil to cook with

1 container of grape tomatoes

1 Package of Naan bread (I like to get at least 3 naans)

Goat cheese (you will use some of the container, reserve the rest for the next time you make these!)

DSC_0400

First things first, start caramelizing the onions, cook low and slow.  As those are cooking down, I prep the grape tomatoes (washing, cutting in half), and lay out the garlic naan on a baking sheet. Then, spread the caramelized onions out on the naan, followed by the tomato halves and small pieces of goat cheese.  Then just bake at 375 degrees until the tomatoes are shrivelling and the edge of the naan is brown (about 12 minutes).

Pull out of the oven, cut into pieces and serve.  So So GOOD.

You can add if you want to get some meat, or different flavours happening (its really good with some fresh basil and a balsamic reduction drizzled on top) but it is so very good as it is.

Wedding Series – Bridesmaids Dresses

When I was planning my our wedding, I had a couple of routes that I was thinking of going with my bridesmaids.

First of all, I had 6.  6 Bridesmaids, 6 Groomsmen and us, making our wedding party quite large at 14 people.  I knew that I wanted everyone to coordinate, but I didn’t want it to be too match-matchy.

I used my Pinterest Wedding Inspiration board to hoard a bunch of ideas

Girls1

Source

girls2

Source

Girls3

Source

And then we had these – so different from the soft pink

Girls5

Source

Girls4

Source

I loved the idea of all the girls wearing a soft pink colour, and everyone wearing different dresses, like they all went out a bought a dress that they loved and felt amazing in.  But that was a little hard to coordinate – having six bridesmaids, all wanting to please me, we instead opted to go shopping as a group.  I really loved the White by Vera Wang line at Davids Bridal, especially since they had a lovely soft pink colour in their collection for 2013, and there were a lot of styles so they wouldn’t have to all wear the same dress.  BUT when we went there, my girls loved two dresses specifically, and they ended up in 3 in one style and 3 in another.  Oh.  And in black.  The dresses that they loved didn’t come in the pink.  I panicked a little bit and my bestie talked me off the ledge.  So we decided to go with black.

For the shoes, I told them I just want them to be pink.  It doesn’t matter what shade, what style.  Just pink.  And look how lovely they were:

IMG_175

IMG_093

IMG_063

IMG_222

Beautiful!

PS. All photographs are courtesy of my amazing photographer Nathan Walker of Nathan Walker Photography and they cannot be reproduced without permission (unless otherwise cited).

Update – Home Tour – Living Room

So.

As previously discussed, my home is a work in progress (let’s be real here – everyone’s home is a work in progress).  Over the past few months I have been working on making my living room a little more liveable.  Lets all remember where we started:

DSC_0396

DSC_0393

Gahh.  So naked.

And now:

DSC_0421photo 1

I have been shopping my house and combined with a few new items and some rearranging, this room is looking a little less drab and a lot more fab.

DSC_0425

DSC_0384

DSC_0383

DSC_0381

DSC_0423

DSC_0439

We have been ‘looking’ for a coffee table since we moved in – by looking I mean casually looked and didn’t buy anything for 0ver 3 years.  So when we found this coffee table from Urban Barn we decided to take the plunge.  It was more expensive than I wanted (although still reasonable) but it was the only one my husband and I could agree on.

DSC_0386

This painting is one of my most prized possessions – it’s an Alex Janvier original that was gifted to my husband and I from my parents at our wedding.  It’s title is ‘Love Lines’.

DSC_0387

DSC_0388

DSC_0421

This area rug was a new acquisition from Homesense – I wanted an 8’x10′ for the space, but I was having a hard time procuring one (that I liked) in my tiny $200-$300 budget.  When I saw this one I thought it would coordinate well being neutral, but that it would also bring some dimension with the Ikat pattern.  And yes, I do see that there are some doggy crunches on the floor next to it, thats a regular occurrence in this house (and I am going to generalize here but I think its a regular occurrence to most people with doggies).

DSC_0367

DSC_0366

We had the floral chairs in the living room before, but when we bought the carpet I though that there were maybe too many different patterns happening and that they were a little too pretty for the space, so I pulled the floral chairs to the kitchen and pulled two dining chairs to the living room.  I think it was a good move.

DSC_0393

Yes, that is a self portrait of my husband and I hanging behind out TV.  It was a recent gift from my brother (who magically found an amazing local portrait painter here in Edmonton on Kijiji – and I regret to inform that I don’t know who it is!).   We haven’t decided where it will live forever, but because its so funny we decided to hang it right there for now (full disclosure, there were some existing screws in the wall from when I moved the TV to that location, the frame behind it was too large and hidden so we moved it to another spot, and left that one naked – self portrait to the rescue!).

DSC_0433

My poor husband had to lose his hair for this portrait, but the likeness is amazing.

DSC_0443

Yes, that is a lounge chair in my living room.  Don’t ask, it’s not permanent.

photo 1

I am pretty happy with its current state.  Of course I have a long list of things that I want to change (new chairs, new couch with chaise lounge, lounge chair back to the basement, new window coverings etc.) but with spending just over $1100 my living room almost looks new.

Quick and Easy Decor Change Up

When we first moved into our house (3.5 years ago) our cousins gave us these brown things (they were going to put them up on their walls but they didn’t like them very much, so they came to us).  I’m not going to lie, I didn’t love them either – brown and just kind-of weird-looking, they weren’t going to work in our house.  That’s why they sat in our basement for 3 years.  I told myself that it was an easy project, but that didn’t stop my from ignoring them for an exceptionally long time.  In my effort to create a better looking living room, I decided it was time.

DSC_0451

DSC_0455

DSC_0453

Guess what I did to them… I sprayed them glossy black.  How original, I know.  BUT I think it made them look a hell of a lot better.

DSC_0457

My trusty purple painting blanket to the rescue.  I always try to elevate whatever I’m spraying to avoid a number of different issues, usually with whatever I have sitting (aka can find within 1 minute) around my garage/house.

DSC_0466

DSC_0461

DSC_0462

DSC_0463

On a completely different note: Look how beautiful my grass looks!

DSC_0471

I just used the least expensive (a nicer way of saying cheapest) black paint I could find at Home Depot. This one sufficed.

DSC_0447

DSC_0456

Once they dried, I decided to hang them on either side of the large window in my living room for symmetry.

DSC_0410

DSC_0416 - Version 2

I used (and by I, I actually mean my trophy husband – thank god for men who are handy) my absolute favourite trick to hang these – 3M Command Hooks for no holes and if I want to move them I don’t feel guilty about having leftover nails/holes in the walls.  I posted about them earlier – you can read all about that here.

photo 1

Sneak peak of my living room make-over!  And my doggie coordinates!

Blueberry Cobbler

So its been a while.  I know.  Sorry!

I figured that I would make it up by sharing this beautiful recipe that I adapted from Kevin & Amanda (a Pinterest find by the way).

Blueberry Cobbler.  Hello!  So good – and especially since blueberries are in season, they are kind of affordable right now so you can make this without breaking the bank.

DSC_0478

The original recipe calls for only 4 ingredient – butter, vanilla cake mix, blueberries and sugar.  Well.  The first time I made this I followed the original recipe and it was WAAAAAAYYYYY too sweet for me and my family.  So I figured an adaptation would be easy.  And it was:

Blueberry Cobbler

3 cups blueberries, 1/4 cup sugar, 3/4 cup flour, 1/2 cup quick oats, 1/2 cup butter, 1/2 of a cake mix.

First things first – pre heat the oven to 350 degrees.  I then followed the original instructions to make brown butter instead of just melting the butter to give the crumble a bit more flavour.  Once the butter has browned, I then add it to my mixer which had half the cake mix, about 1/2 a cup of flour and 1/2  a cup of quick oats, stirring until it was crumbly.  If its still too wet just add more of the dry ingredients (in my case I added a bit more cake mix).  To prepare the blueberries I just rinsed them and tossed them in the 1/4 cup sugar and a scant 1/4 cup flour.  Then just put them in a greased my Sophie Conran baking dish (because Sophie Conran makes the best stuff) and put the crumbs on top.  Bake at 350 for 40 minutes until its all bubbly and delicious.

DSC_0487

DSC_0481

DSC_0485

And then you eat it.

I hope this makes up for the fact that I haven’t done anything new here in a long long long long time.  The entire time that I typed this post I made the awkward smile face.  You know the one:

awkward dog